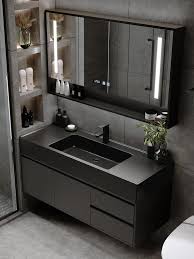
Are you considering upgrading your bathroom with a stylish and functional 36-inch vanity? Installing a vanity can elevate the look and functionality of your bathroom, but it requires careful planning and execution. Whether you’re a seasoned DIY enthusiast or a novice homeowner, this user-friendly guide will provide you with essential tips for a successful installation.
1. Measure Twice, Install Once
Before you start any installation project, it’s crucial to measure your space accurately. A 36 inch vanity may seem like a standard size, but every inch counts in a compact bathroom. Measure the width, depth, and height of your bathroom to ensure the vanity will fit seamlessly without obstructing doors, windows, or other fixtures.
2. Choose the Right Location
Selecting the ideal location for your 36-inch vanity is key to maximizing both aesthetics and functionality. Consider factors such as plumbing access, electrical outlets, and clearance space for drawers and cabinet doors. Additionally, ensure there is sufficient lighting in the chosen area to enhance visibility and ambiance.
3. Prepare the Area
Preparation is essential for a smooth installation process. Clear out any clutter or obstacles from the installation area and protect your flooring with drop cloths or cardboard to prevent damage. If necessary, shut off the water supply to the bathroom and disconnect plumbing fixtures before proceeding.
4. Assemble Your Tools and Materials
Gather all the necessary tools and materials before you begin installing your 36-inch vanity. Common tools may include a power drill, screwdriver, level, measuring tape, and adjustable wrench. Additionally, make sure you have the appropriate hardware supplied with your vanity for secure installation.
5. Follow Manufacturer Instructions
Every vanity model may have unique installation requirements, so it’s essential to carefully read and follow the manufacturer’s instructions provided with your vanity. Pay close attention to any specific steps or warnings to ensure proper assembly and installation.
6. Secure the Vanity in Place
Once you’ve assembled the vanity components, it’s time to secure it in place. Use a level to ensure the vanity is perfectly aligned and adjust the legs or shims as needed to compensate for any uneven flooring. Secure the vanity to the wall studs using appropriate screws or mounting brackets for stability and safety.
7. Connect Plumbing Fixtures
After securing the vanity in place, reattach the plumbing fixtures according to the manufacturer’s instructions. Take care to properly seal connections with plumber’s tape or sealant to prevent leaks. Test the water supply to ensure everything is functioning correctly before finalizing the installation.
8. Add Finishing Touches
Once the vanity is securely installed and the plumbing fixtures are connected, it’s time to add the finishing touches. Install any included hardware, such as drawer pulls or cabinet knobs, and adjust doors and drawers for smooth operation. Consider adding a backsplash or countertop accessories to enhance the vanity’s aesthetic appeal.
9. Regular Maintenance
Maintaining your 36-inch vanity is essential to prolong its lifespan and keep it looking pristine. Clean the surfaces regularly with mild soap and water, avoiding harsh chemicals that may damage the finish. Check for any signs of wear or damage and address them promptly to prevent further issues.
In conclusion, installing a 36-inch vanity can be a rewarding project that transforms your bathroom into a stylish and functional space. By following these essential tips and taking the time to plan and execute the installation properly, you can achieve professional-looking results with ease. Enjoy your newly upgraded bathroom oasis!
For more home improvement tips and inspiration, visit hm-decor.com.